

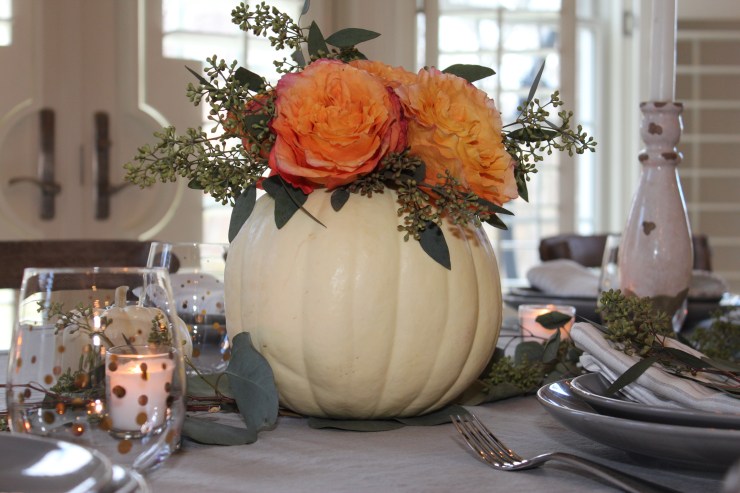
A white pumpkin filled with colorful roses makes quite a unique statement for the Fall Season. Whether you use the centerpiece on a dinner table or in your bedroom, this bright floral arrangement will bring a smile to your face.
I made three of these beautiful centerpieces to use on my table HERE for a dinner party. They work perfectly as a table centerpiece because they are not too tall so you can comfortably talk over them to guests sitting across the table.
Supplies Needed to Make a Pumpkin Centerpiece
For this easy centerpiece, you will need a pumpkin, a container to hold the flowers, a spoon or scooper of some sort and 2 types of eucalyptus. You will also need 5 roses, I suggest using English or Tea Roses, they will give you a full looking arrangement.
Check out this video on how to make a pumpkin centerpiece using sunflowers HERE.
How Long Will a Pumpkin Centerpiece Last?
The pumpkin will last about 7 days before getting moldy, so plan accordingly if you are using it for a special event or holiday gathering.

Preparation for Making a Pumpkin Centerpiece
The first thing you want to do is prepare your pumpkins. Wash them with soap and water to remove any dirt and dry them thoroughly.
Remove the stem from the pumpkin. You may be able to snap it off with your hand or use a knife to cut if off, be careful not to cut yourself if you use a knife.
You can keep the stems for other Fall DIY projects like this one HERE.

How to Make a Pumpkin Centerpiece
Determine the size of the container you should use by roughly measuring it against your pumpkin. The container should not be taller than the pumpkin, it should fit comfortably inside the pumpkin.
Once you have determined the proper size of your container, draw your outline around the top of the pumpkin. I used a magic marker and a disposable cup. Make sure your container is able to hold water for an extended period of time.
 Cut around the outline of the pumpkin using a sharp knife and scoop out the seeds from the inside.
 Place your container inside the hollow pumpkin and fill with water.
Insert 5 roses, 4 around the edges and 1 in the middle. You will have a fuller arrangement if your roses have opened up a bit. Use 2 types of eucalyptus, leafy and seeded. Place the seeded eucalyptus around the base of the pumpkin.
 To ensure longevity of your centerpiece, check the arrangement everyday and add water if necessary.
 With the proper care, this beauty will last a week or longer! Enjoy!!
For more posts about floral arrangements, subscribe to Happy Haute Home and follow along on Pintrest HERE, and Twitter HERE and feel free to pin and tweet your favorite pics from Happy Haute Home.
You can also get daily home decor inspiration by following along on Instagram HERE.


You did such a great job! That is a beautiful centerpiece and was probably the star of your dinner party because it so eye catching.
Thank you!! It was so easy to do too! A great fun Fall project 🙂
Beautiful, thank you for sharing!
You are very welcome! I hope you make one for yourself.
I think I just might!
Beautiful!!🌻
Thank you so much for the great idea!!
You are very welcome! Thank you for visiting 🙂
This is gorgeous! However, I am allergic to Eucalyptus. Do you have another recommendation for what to put with the roses? I’d love to make some of these! 🙂 <3 <3
Oh No Lynn! How sad 🙁 Eucalyptus is so pretty. You could substitute berries for the eucalyptus, that would make for a nice addition to the centerpiece.
SO beautiful Denise! I love this pumpkin concept – I’m definitely going to try it this year! Thanks for the tip on cutting the hole to fit the container, too. Perfect! 🧡
Oh good, can’t wait to see it! Yes cut the hole the size of the container…don’t want to make a rookie mistake and ruin your centerpiece! 😂