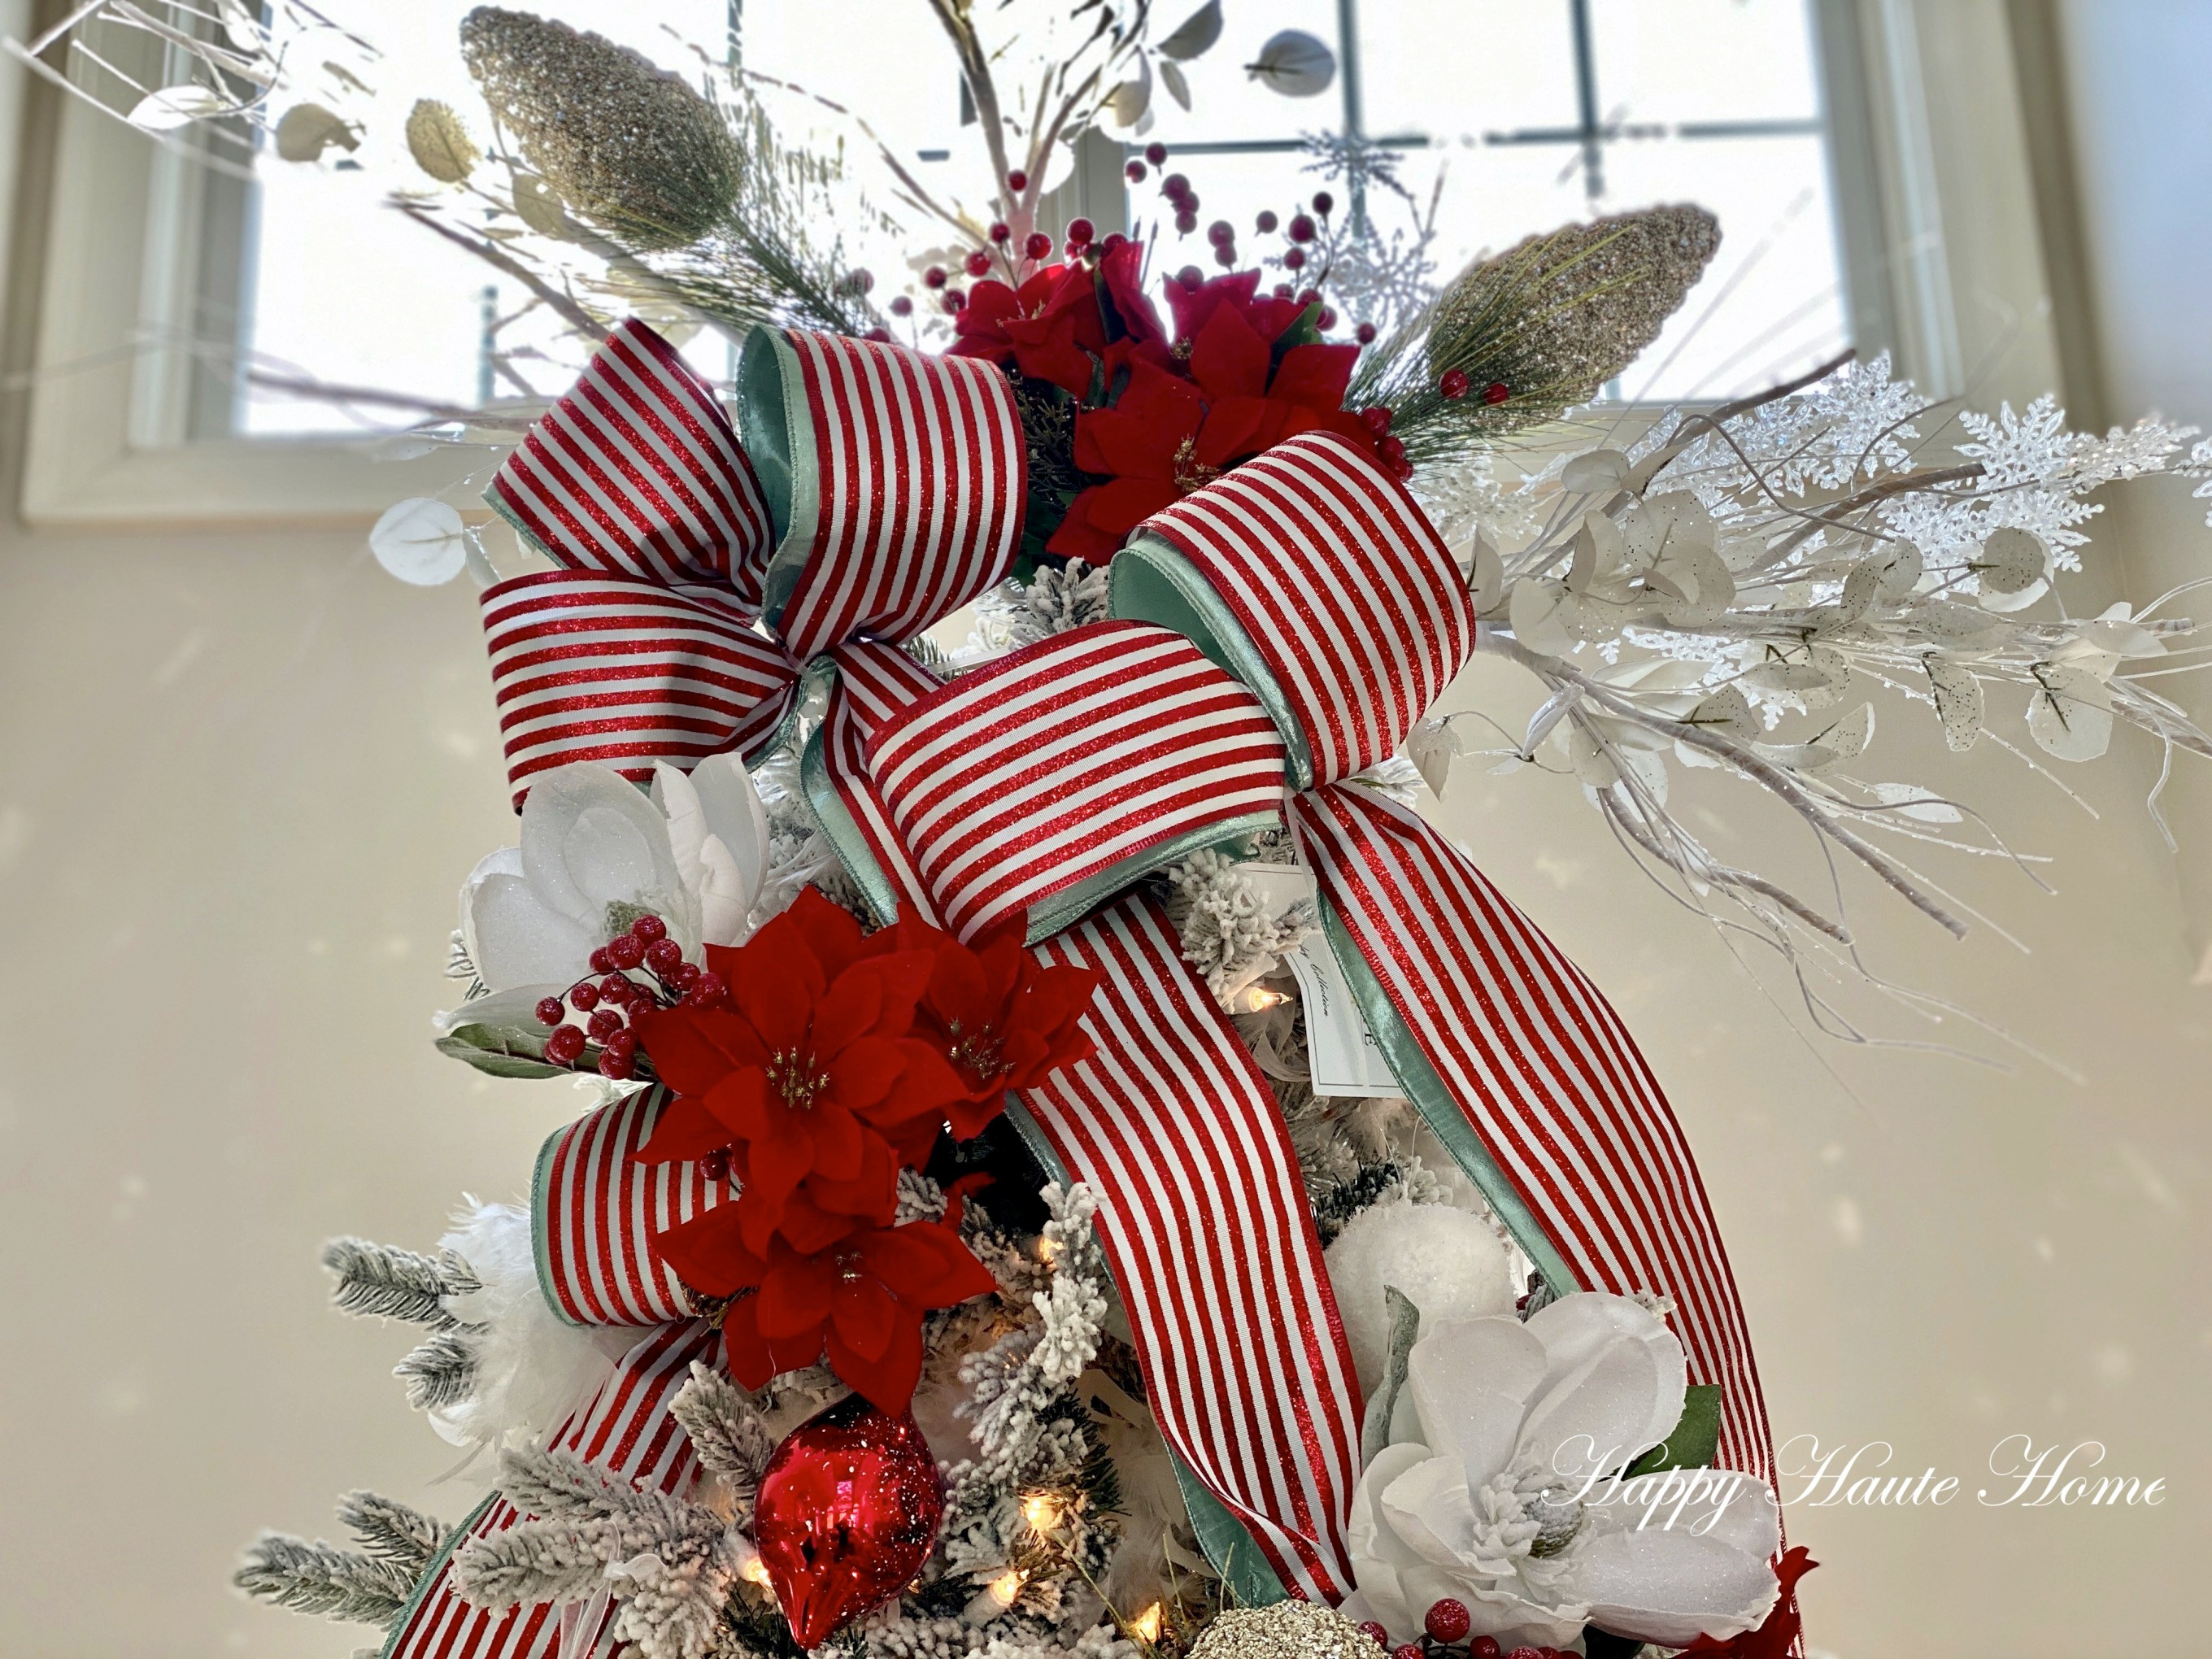
Making a fabulous tree topper isn’t as hard as it looks, as long as you have the right materials.
First, I want to wish you all a very happy Thanksgiving. I am enjoying the day with my extended family in our home. It’s a fun day and we look forward to it every year. I spent the entire day before Thanksgiving cooking my side dishes and tried several new recipes this year. The kids are off of school and it was a relaxing day of cooking. I know many of you will start trimming your tree very soon so I want to offer up some ideas for a tree topper.
Angels and stars are traditional and very pretty but sometimes you want a little something different, a creative topper that says WOW…look at me, I’m different.
Finding the right topper materials can be tricky especially if you wait until the last minute. You’ve heard me say it before and I’ll say it again….my advice is to shop early!! As early as possible. To get the best pickings….you want to start perusing the Christmas decor aisles ASAP. Just set aside your items until you are ready to use them, but you will have the satisfaction knowing you had first dibs and first dibs are nice 😉
I found most of my topper materials at Joann. My topper consisted of five elements plus two kinds of ribbon. When creating a topper, I suggest to pick a wide variety of interesting stems and ribbons. My tree is frosted so I knew I wanted to include white. I also have red berries and red poinsettias on my tree, so I added red as well. To pull it all together, I started my cascading ribbon from the top of the tree and created loops or so called bows.
I used one bunch of velvet poinsettias in the topper. I separated/cut the flowers so I could arrange them how I wanted, and so the stems can face forwards instead of upwards.
I started my masterpiece by laying the stems on the floor.
To visualize the topper, I played around with varying designs.
I kept adding stems to the arrangement until I was happy with the look. For balance, I used an equal number (three of each) and created a fan effect except for the glittery pinecones (I used only two). I do not recommend cutting the long stems, you will need them to attach to the tree.
I added the flower stems last. To this point, I had not attached any stems together, I am just playing with the arrangement to see what looks best. I used six white stems (three each of two varieties), two pinecone stems and one bunch of flowers.
The stems are too heavy to tie all together with one zip tie, so I use several ties and group the stems. Here, I grouped the flowers, berries and small pinecones together.
Attaching another group of stems to the bunch. I added the large glittery pinecones to the bunch and attached another zip tie.
Now, it’s time to group the large heavier stems.
I start with attaching only a few together, trying to attach too many will not hold and it will “topple” over 🤣
Adding in more stems and attaching more zip ties.
Keep adding in all your stems using additional ties.
Lastly, I added the grouping of flowers to the bunch.
A glue gun comes in handy when the flower heads start to fall off. I used a drop of glue to attach the flower back onto the stem.
The topper is ready to be attached to the tree.
This step usually requires a ladder. All those stems that are sticking out are useful when attaching the topper to the tree.
I use the long stems to wedge them into the tree to hold the topper.
Depending on your tree, you could use a zip tie to attach the topper to the top branches of the tree, but I didn’t do that. My tree branches held the topper in place without any additional assistance.
Now to add ribbon – I used two types and they are four inches wide.
I added three stands of ribbon to the tree. The first strand has three loops at the top, the second strand has two loops, and the third strand has a single loop.
I overlap the ribbon and twist it to create each loop.
I don’t cut the ribbon when I create the loops for each strand. I only cut the ribbon to create each strand, does that make sense?
I attach the first triple loop strand to the topper using a zip tie.
I create two more strands and attach those to the top as well.
And now you have created a designer topper for your Christmas tree too 🙂 Since my tree backs to windows and doors, I designed my topper to be one sided. If the tree was going to be centered in a room, I would add an additional bunch of flowers and cascade the ribbons down the back as well.
Have you decorated your tree yet? Drop me a line, I’d love to hear from you.
Coming up next week, designing the fireplace mantle and a full tour of the room.
Denise
XO
Subscribe to Happy Haute Home
For more informative posts about holiday decor and gatherings, please subscribe to Happy Haute Home and follow along on Pinterest HERE, and Twitter HERE and feel free to pin and tweet your favorite pics from Happy Haute Home.
You can also get daily home decor inspiration by following along on Instagram HERE
2 thoughts on “How to DIY a Designer Christmas Tree Topper”
That’s gorgeous Denise! You always do a wonderful job with your trees, and now I know your secret! 🙂 Thanks for the great tutorial, and hope you had a great Thanksgiving!
So glad you like them Barbara 🙂 We had a fabulous Thanksgiving, I’m still recovering! Hope you and your family did too my friend.

 Angels and stars are traditional and very pretty but sometimes you want a little something different, a creative topper that says WOW…look at me, I’m different.
 I found most of my topper materials at Joann. My topper consisted of five elements plus two kinds of ribbon. When creating a topper, I suggest to pick a wide variety of interesting stems and ribbons. My tree is frosted so I knew I wanted to include white. I also have red berries and red poinsettias on my tree, so I added red as well. To pull it all together, I started my cascading ribbon from the top of the tree and created loops or so called bows.
 I used one bunch of velvet poinsettias in the topper. I separated/cut the flowers so I could arrange them how I wanted, and so the stems can face forwards instead of upwards.
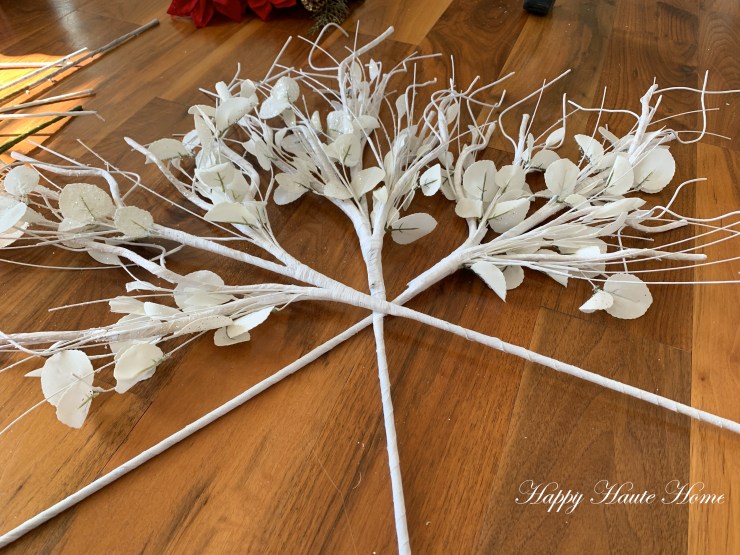 I started my masterpiece by laying the stems on the floor.
 To visualize the topper, I played around with varying designs.
 I kept adding stems to the arrangement until I was happy with the look. For balance, I used an equal number (three of each) and created a fan effect except for the glittery pinecones (I used only two). I do not recommend cutting the long stems, you will need them to attach to the tree.
 I added the flower stems last. To this point, I had not attached any stems together, I am just playing with the arrangement to see what looks best. I used six white stems (three each of two varieties), two pinecone stems and one bunch of flowers.
 Zip ties are my go to for this DIY.
 The stems are too heavy to tie all together with one zip tie, so I use several ties and group the stems. Here, I grouped the flowers, berries and small pinecones together.
 Attaching another group of stems to the bunch. I added the large glittery pinecones to the bunch and attached another zip tie.
 Now, it’s time to group the large heavier stems.
 I start with attaching only a few together, trying to attach too many will not hold and it will “topple” over 🤣
 Adding in more stems and attaching more zip ties.
 Keep adding in all your stems using additional ties.
 Lastly, I added the grouping of flowers to the bunch.
 A glue gun comes in handy when the flower heads start to fall off. I used a drop of glue to attach the flower back onto the stem.
 The topper is ready to be attached to the tree.
 This step usually requires a ladder. All those stems that are sticking out are useful when attaching the topper to the tree.
 I use the long stems to wedge them into the tree to hold the topper.
 Depending on your tree, you could use a zip tie to attach the topper to the top branches of the tree, but I didn’t do that. My tree branches held the topper in place without any additional assistance.
 Now to add ribbon – I used two types and they are four inches wide.
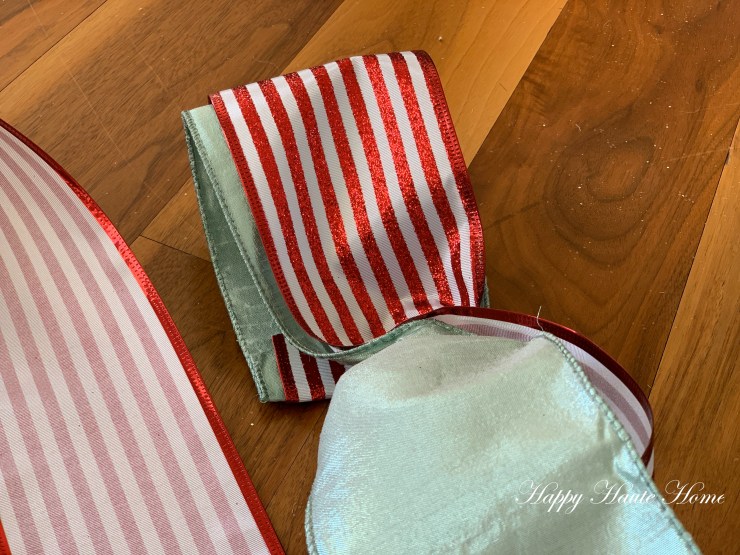 I added three stands of ribbon to the tree. The first strand has three loops at the top, the second strand has two loops, and the third strand has a single loop.
 I overlap the ribbon and twist it to create each loop.
 I don’t cut the ribbon when I create the loops for each strand. I only cut the ribbon to create each strand, does that make sense?
 I attach the first triple loop strand to the topper using a zip tie.
 The ribbon will loosely hang down and I will tuck it into the tree using, you guessed it a zip tie. Check out How to Decorate a Christmas Tree with Ribbon for additional tips.
 And now you have created a designer topper for your Christmas tree too 🙂 Since my tree backs to windows and doors, I designed my topper to be one sided. If the tree was going to be centered in a room, I would add an additional bunch of flowers and cascade the ribbons down the back as well.


That’s gorgeous Denise! You always do a wonderful job with your trees, and now I know your secret! 🙂 Thanks for the great tutorial, and hope you had a great Thanksgiving!
So glad you like them Barbara 🙂 We had a fabulous Thanksgiving, I’m still recovering! Hope you and your family did too my friend.