


The time has officially arrived. It’s been a rough 7 weeks for us and our DIY kitchen renovation, but we are so happy the job is finally complete!
We embarked as guest participants in the “One Room Challenge”, hosted by Linda at Calling it Home HERE and sponsored by House Beautiful HERE.
The One Room Challenge is a biannual event every April and October. Each round, twenty design bloggers take the challenge and transform a space. Every Wednesday, the designers document their process while sharing their sources and professional advice over the six weekly posts. If you haven’t had a chance to check out these amazing transformations, you will be wowed by what these designers have put together HERE.
As for me, I love participating in this challenge. Adhering to a strict timeline is a great motivator for me, and a wonderful opportunity to transform a room in our home. During a previous season I renovated our master bedroom in a prior home HERE.
This season, we decided to give our kitchen a makeover. We started 7 weeks ago, and the time has flown by. You can catch up on all the progress along the way by clicking on the links.
Kitchen Renovation (Week 1) Before Pictures
Kitchen Renovation (Week 2) The Design Plan
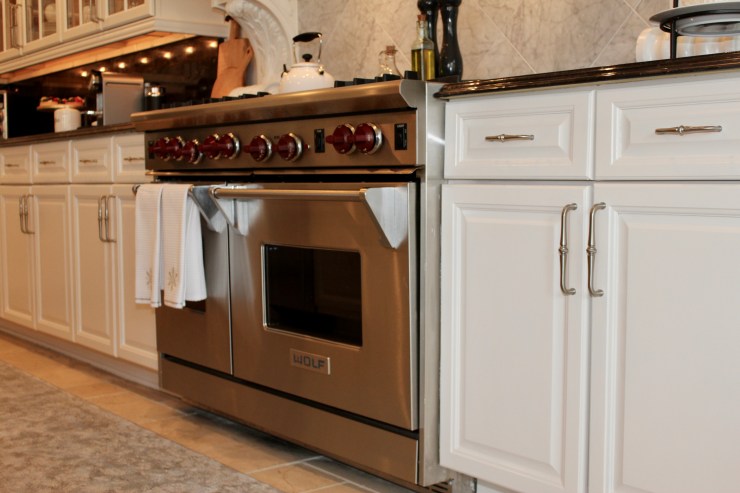
Kitchen Renovation (Week 3) Painting Island Cabinets & Steam Cleaning Natural Stone
Kitchen Renovation (Week 4) Range Hood Transformation
Kitchen Renovation (Week 5) Fireplace Surround & New Cabinet Hardware
Kitchen Renovation (Week 6) New Lighting
Our to-do list for the renovation included the following:
Paint cabinets on the center island dark grayPaint wall cabinets on island #2 a creamy whitePaint range hood creamy whiteReplace textured glass on cabinet doors with clear glassReplace all cabinet hardwareSteam clean the travertine floorsReplace the pendants hanging over island #1Replace the chandelier in dining areaDecide on furniture for dining area and front of fireplace- Replace bar stools (on order)
- Replace backsplash
Install under cabinet and in cabinet lightingPaint kitchen walls
All the items on the original to-do list have been completed with the exception of replacing the backsplash. Instead of replacing the backsplash, I color sealed the grout lines in the area under the range hood, giving it a fresh, clean and new look. You can read about how easy it is to color seal grout HERE.
As for the backsplash under the wall cabinets, we decided against replacing it because we were worried about damaging the countertops during the removal process. Our backsplash under these cabinets is a slab of marble, the same marble as the countertops.
Our soon-to-be new bar stools are a custom order and unfortunately didn’t arrive in time for the final reveal. But I will update you with pictures when they do arrive.
Let’s take a look at the before pictures of our kitchen space.


Don’t get me started on that range hood! And the monogramming?! That’s a story for another day.


Going back to my design board, these are existing and new elements I am working with for the remodel:

Now, lets take a look at the newly renovated space!


We replaced 4 smaller pendants over island #1, with 2 lantern pendants HERE. Love them! No glass, nothing to clean, totally smudge free.


We decided on a simple settee for the fireplace, and we love it. It fits the space perfectly and is so comfortable SIMILAR HERE . A white sheepskin rugs HERE adds to the coziness.


I can’t tell you how thrilled I am to have participated and completed a remodel of our kitchen. Now, the space feels so bright and inviting, a few changes made a world of difference.
Our future goal is to do a full kitchen remodel in a few years, with new cabinets and range hood, but this intermittent DIY makeover (excluding furniture and lighting) costed less than $1,000.
If you’re thinking about a mini makeover for your kitchen, there are many DIY changes you can make on any budget to update your space.
If your budget is $100, I suggest painting the walls, it makes a dramatic difference.
If your budget is $300, paint the walls and replace a light fixture.
If your budget is $500, paint the walls, replace a light fixture, and update the faucet. If you can add another couple hundred dollars onto that, consider replacing the sink.
If you have $1,000 to spend, consider the items listed above, paint the cabinets and add new hardware.
Little changes go a long way in updating a space. Thanks so much for visiting, I hope you enjoyed seeing our transformation. I’ll see you next time! Feel free to tweet, pin, and repost this article. Follow along on Instagram HERE and subscribe to Happy Haute Home to get bi-weekly posts delivered to your inbox.
