

Having long dreamed about having a large orchid centerpiece in my home, that vision finally turned into reality.
We’ve all seen those gorgeous orchid arrangements in hotels and on TV, they seem to be everywhere! But when I researched the cost to purchase one…the sticker shock made me think twice. After all, it can’t be that hard to make right?
Live arrangements are close to $400 and the really nice faux ones, aren’t that much less. I don’t understand why they cost so much! So I decided to make one myself. This way, I can pick out the container and color for my centerpiece and avoid a huge price tag.
Now Happy Haute Home is on YouTube
If you would like to view the post as a video, please visit my YouTube Channel.
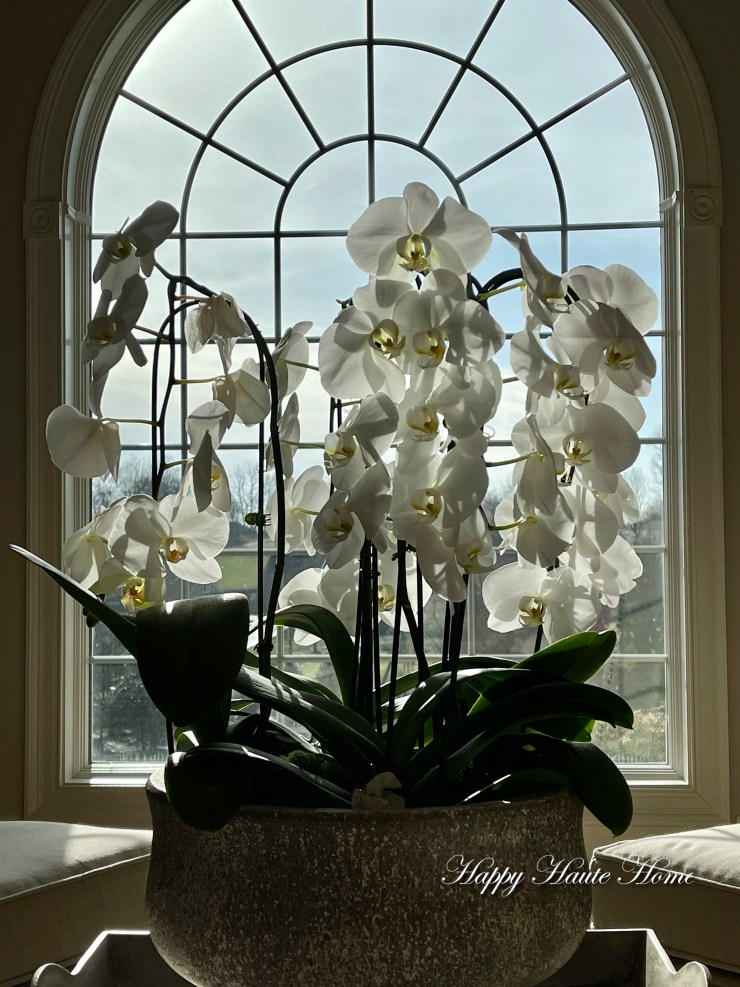
How to Make an Orchid Centerpiece

I made this centerpiece over two months ago and it still look fabulous. It’s so easy to care for and only a couple blooms have fallen off.
Pick a Container Deep Enough to Fit the Orchids

When you select your container, make sure it is deep enough to fit the plastic containers. You want the orchid container to be flush with the vessel.
You may want to check out these containers HERE, HERE, HERE, and HERE.
Fill the Container with Plastic Bags
I used plastic bags to fill the empty space inside the container. Mine is very deep and large, so I used a lot of plastic bags.

My vessel is about 14 inches wide and fits 4 orchids nicely.

Remember to leave the orchids inside the plastic container they come with, even though it may be tempting to take them out and plant in dirt.
Transplanting them in dirt may also work, but I wasn’t about to test it out. I have purchased orchids in the past and always left them in the plastic container they have become accustomed to and they last quite a while.

Fill out the entire container with plastic bags so the orchids are sturdy and won’t fall over, as they can get top heavy.

Stuffing plastic bags securely around each container helps to stabilize the centerpiece.
Top with Green Moss

Top with decorative green moss to give the centerpiece a finished look. It’s that easy!

Caring for Your Orchid Centerpiece
Water each container with two ounces of water once a week. My orchids seem to be happiest in a partly sunny location and are really thriving.
Lastly, enjoy your beautiful centerpiece!
I can’t believe January is half over. Hope you all are having a beautiful start to the New Year.
PIN IT!

Denise
XO
Please Subscribe to Happy Haute Home
For more posts about outdoor projects and home decor, please subscribe to Happy Haute Home and follow along on Pinterest HERE, and feel free to pin your favorite pics from Happy Haute Home.
You can also follow along on my Instagram HERE and check out my daily stories HERE. Please also check out my YouTube Channel HERE. All these links can be accessed from the home page on the social media menu


What a beautiful centerpiece. I just love Orchids. Interesting way to make the centerpiece.
Thanks for sharing.
Hi Crystal, you are very welcome. So far, it’s working out great! Thanks for stopping by
The centerpiece is lovely but I thought orchids needed to have air circulation. With the plastic bags and then moss it seems as though the air flow would be inhabited. I guess not though because they certainly are thriving.
My orchids did great for years. I kept them in the plastic container they can in and they thrived.