
Our backyard patio project has been moving along at lighting speed. When you have the right team and proper tools, a successful job is almost guaranteed.
In less than a week, my team has ripped up and removed the old bricks on our patio HERE, and demolished the fireplace HERE. Now they are ready to lay concrete over the existing foundation.
Extending the Patio Surface
Even though our patio was a large space at roughly 1,100 sq ft, we felt it was a bit long and narrow and not fully functioning. But removing the fireplace has really opened up the space and given us more room. We also decided to extend the patio an additional 4 feet.
 The additional space is being excavated and measured.
 This is the corner where the fireplace used to reside..still looks so strange not to see that large structure in the yard. My hydrangea narrowly escaped death, as it is too hot to transplant now. We will relocate it once the weather cools down.
Preparing the Form for the New Patio
After the new 4 ft extension has been excavated, granular fill is laid in place to aid in the formation of the concrete. It is also very important for the patio to have a proper slope, so rain doesn’t collect near the house.
 To get a nice straight edge and perfect corners, we need a level form, boards are set around the patio outline and nailed to corner stakes.
 Installing wire mesh or rebar (steel reinforcing bars) is important to the concrete’s stability. It helps with reinforcement, strength, and makes the concrete resistant to cracks.
Preparing for the Concrete Truck to Arrive
It is very important to have everything completed before the concrete truck arrives. Proper preparation is important to making this concrete job go “smoothly”. Make sure the form is square, level, straight, and well braced.
 The route is planned out before the concrete truck arrives. We had a lot of rain this week and the ground is muddy, plywood boards are laid and a path is created for the workers to haul the concrete to the site quickly.
 The weather must be perfect for laying concrete. If the weather is hot and windy, that can accelerate the hardening process, turning the slab hard before there is sufficient time to create a smooth finish. Rain can also ruin a surface, it’s very important to plan this day carefully ahead of time.
 BUT…there is a threat of rain later in the afternoon on the day we laid our concrete. The truck arrives very early in the morning and several guys are working quickly to haul the wet concrete to the site.

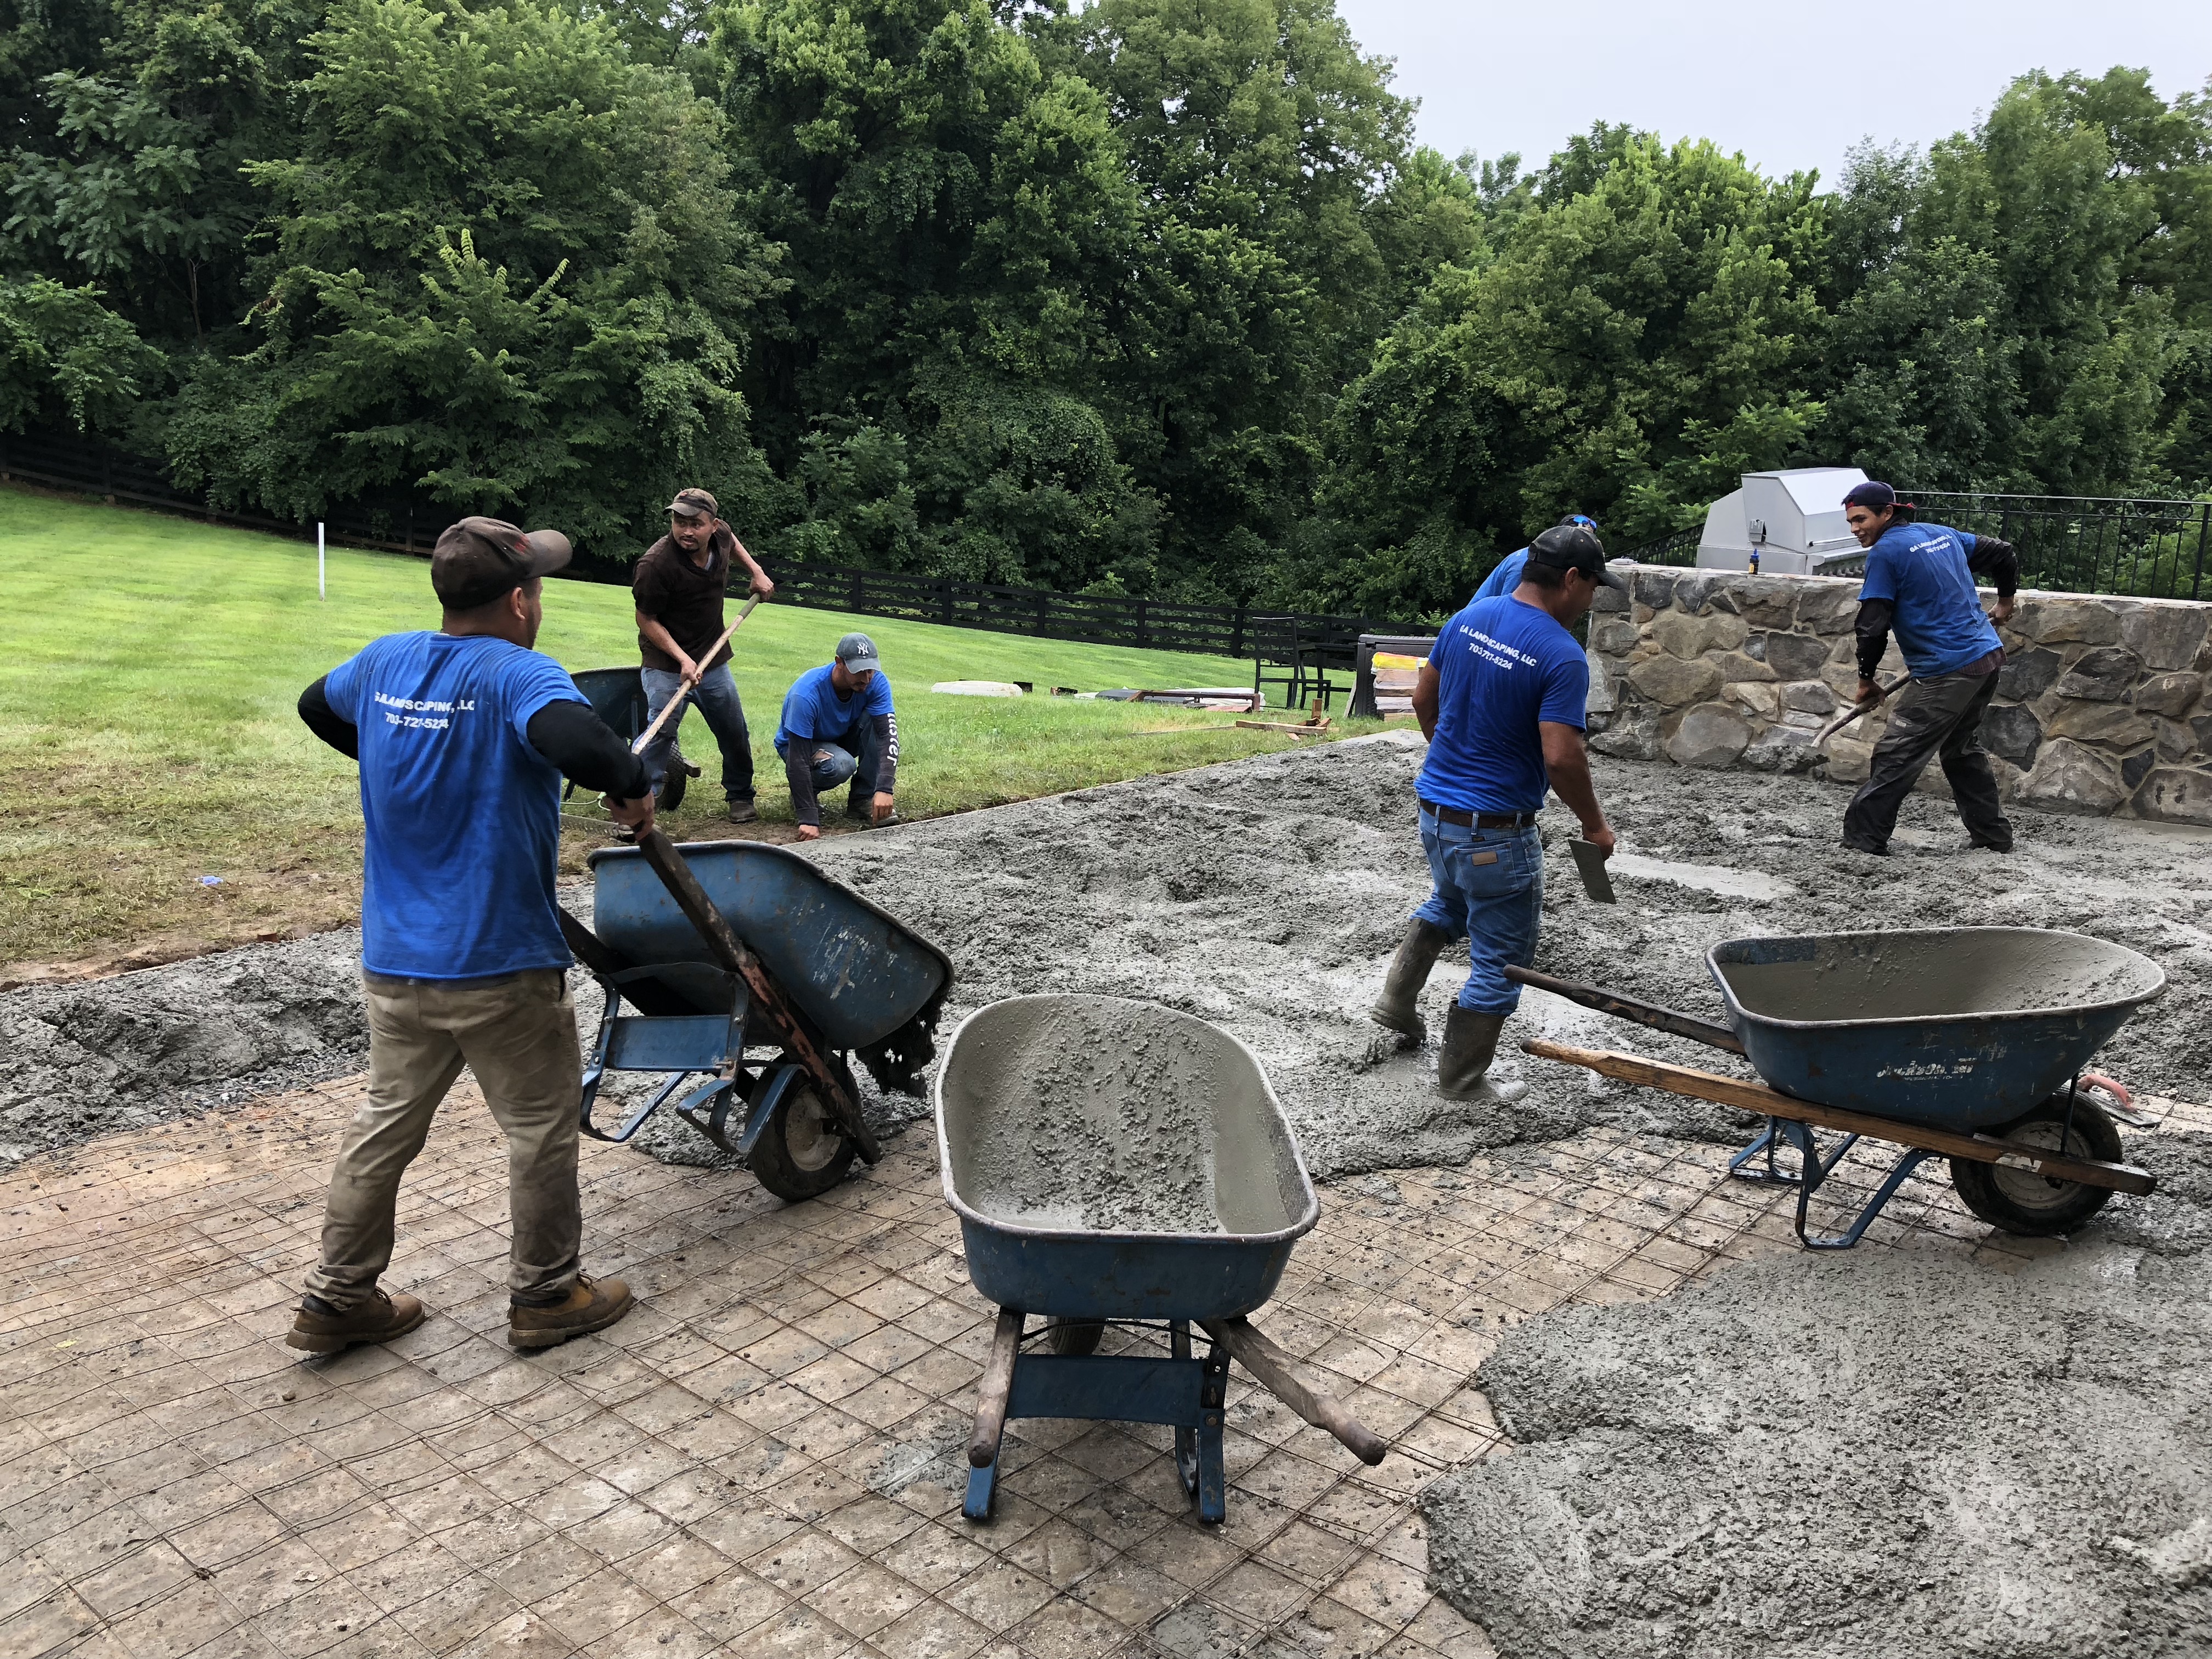
Laying the Concrete for the Patio
The wet concrete is dumped from the wheel barrows and several men are working swiftly to level the concrete before it hardens.
 This is definitely a team effort and I’m impressed with my crew.

Smoothing the Concrete Surface
A straight board is dragged across the top of the concrete form to smooth the surface.
 Multiple passes are needed to create a flat and even surface.
 Almost done, and the rain has held off….so far.
 The last section of concrete is poured.
 And smoothed out.
 This initial area of the concrete dries fairly quickly, and is safe to walk on.
 Oh shit! It’s starting to rain! The workers quickly cover the patio with large tarps.
 And….this is what wet concrete looks like when it gets rained on – large pits formed and the surface is ruined.
95% of the patio is fine, the last little section was mixed with rain. It’s okay, I know my crew will fix it.
What’s Next for this Project?
I spent weeks researching different materials, travertine stone colors, websites, and stone centers. I feel good about the stone I am choosing for this project, but it is a special order from overseas and will take 2 -3 months to arrive. I was not able to find the right color or pattern of travertine locally and rather than rush the job, we decided to place a special order. We will also be using this stone when we build our pool next Spring so I need to plan accordingly.
Stay tuned and thanks for following along! Are you working on any outdoor projects this year?
For more informative posts about outdoors and gardening, subscribe to Happy Haute Home and follow along on Pintrest HERE, and Twitter HERE and feel free to pin and tweet your favorite pics from Happy Haute Home.
You can also get daily home decor inspiration by following along on Instagram HERE.


Beautifully done! Sorry about the 5%, though. Will look forward to seein the travertine when it finally arrives!! Sounds gorgeous! 💜💜
Thanks Lynn! I am hoping it will turn out as expected…I hope 😉
I can’t wait to see the finished space. It is really shaping up nicely.
It is! I can’t wait either…waiting on the stone now. Excited to see if move along to the next phase.